
Turning Ideas into Sellable, Wash-Proof Designs
Design is the heart of your business.
But with HTV, a good design isn’t just about looking pretty — it’s about performance.
A design that’s too thin? It peels.
A design that’s not mirrored? It’s wasted vinyl.
This module will show you how to:
- Source and use designs legally
- Create clean, professional layouts
- Work with fonts that actually last on fabric
- Use tools like Canva to sell your ideas before you even press
🧩 1. Sourcing & Using SVG Designs (The Smart Way)
SVG files (Scalable Vector Graphics) are your best friend.
Unlike images, they:
- Don’t pixelate
- Scale perfectly
- Cut cleanly on your machine
Where to Find Them
- Creative Fabrica (top choice for commercial use)
- Design Bundles
- Etsy (great for niche themes)
⚠️ Non-Negotiable Rule
Always check for commercial use licensing.
This isn’t just admin — it protects your business.
🛠️ How to Use Them
- Download and unzip your files
- Import into your cutting software
- Resize and prepare for cutting
👉 If you’re unsure how to import your designs, watch this simple walkthrough:
🔗 https://www.youtube.com/watch?v=EZejKLY7A_0&list=PL6euVBZ4Qfhyuox8UwypDD23HnH7-NVaO&index=8
🔗https://help.cricut.com/hc/en-us/articles/360009556313-How-to-upload-images-into-Design-Space?utm_source=chatgpt.com
💡 Keep it simple — your goal is just to get your design into your software and ready to cut.
📁 The “Chantelle” Organisation System
Create folders by theme:
- Baby grows
- Teacher gifts
- Holidays
- Bridal
When orders pick up, this system saves you hours.
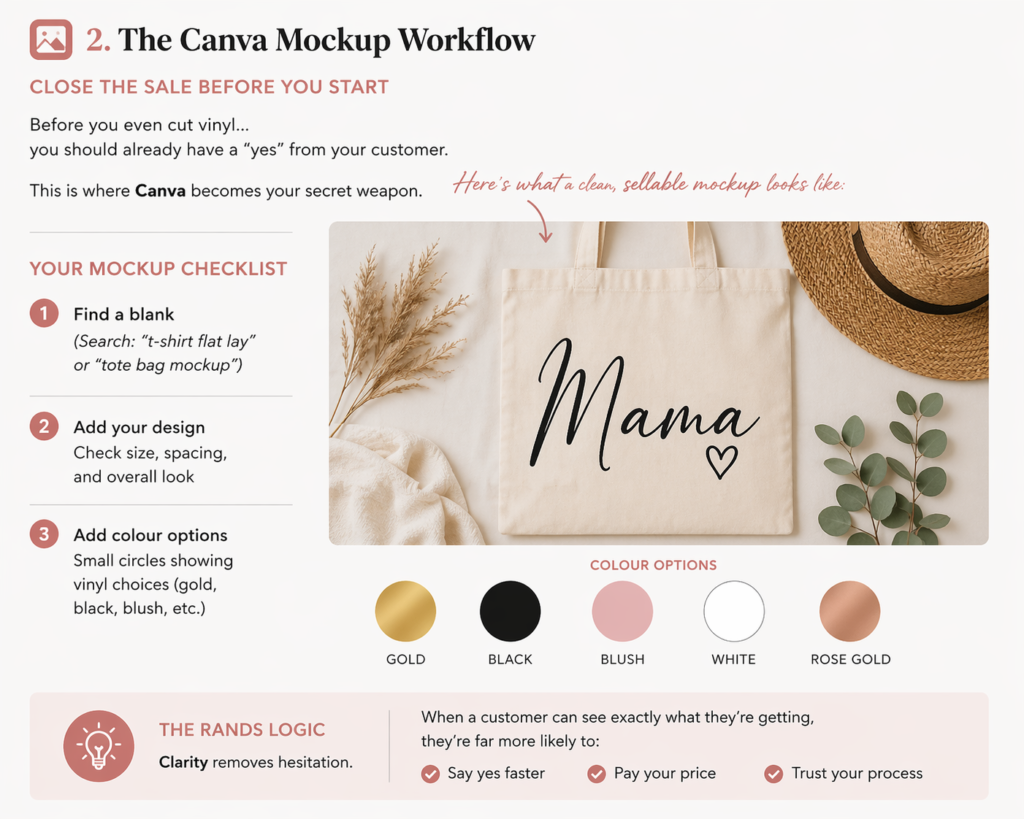
🖼️ 2. The Canva Mockup Workflow
Close the Sale Before You Start
Before you even cut vinyl…
you should already have a “yes” from your customer.
This is where Canva becomes your secret weapon.
Your Mockup Checklist
- Find a blank
(Search: “t-shirt flat lay” or “tote bag mockup”) - Add your design
Check size, spacing, and overall look - Add colour options
Small circles showing vinyl choices (gold, black, blush, etc.)
👀 Here’s what a clean, sellable mockup looks like:
🔤 3. Text, Fonts & Layout
Where Most People Go Wrong
Most HTV designs are text-based:
Names. Quotes. Milestones.
This is where beginners either shine… or struggle.
The “Wash-Safe” Rule
Avoid thin, delicate fonts.
They:
- Are hard to weed
- Don’t hold up after washing
👉 Stick to:
- Medium to bold weights
- Clean, readable styles
Font Pairing Made Simple
The Classic Combo:
- Script font (for the name)
- Clean block font (for details)
The Golden Rule
👉 Never use more than 2 fonts in one design
Simple = premium
Where to Find Fonts
- Google Fonts (clean, reliable)
- DaFont (more playful — always check licensing!)
Signature Combos
- Luxe Look: Playfair Display + Brittany Signature
- Funky Look: Archivo Black + Yellowtail
🛠️ 4. Design Platforms (Keep It Simple)
You don’t need expensive software to look professional.
Cricut Design Space / Silhouette Studio
Use these for final cut prep.
👉 THE GOLDEN RULE:
Always mirror your design before cutting HTV.
Canva
Perfect for:
- Mockups
- Marketing visuals
- Cleaning up client logos
Creative Fabrica Spark
Helpful when you need quick inspiration or design starting points.
📏 5. Placement & Sizing
The Difference Between “DIY” and “Store-Bought”
Good placement instantly makes your product look professional.
THE PLACEMENT CHEAT SHEET
| Garment Type | Design Width | Placement |
|---|---|---|
| Infant | 10–12cm | 2.5cm down |
| Toddler | 15–16cm | 4cm down |
| Youth | 18–20cm | 5cm down |
| Adult (S–XL) | 23–28cm | 7.5cm down |
| Adult (2XL+) | 28–32cm | 10cm down |
💡 Pro Trick: The Fold Method
- Fold shirt vertically and press lightly to create a centre line
- Fold your design to find its centre
- Align both
👉 Perfect placement. Every time.
🧰 6. Your “Don’t Waste Time” Toolkit
Keep these within reach:
- Ruler or tape measure
- Placement guide (print it!)
- Your go-to font list
Because searching mid-order = lost time and broken flow.
🧼 7. The Care Card
Protect Your Work + Build Trust
Every order should include care instructions.
Not optional. Not “when you remember.”
Why it matters:
- Protects your product
- Reduces complaints
- Builds trust
- Makes you look professional
Simple Care Guide (Include in Every Order)
- Wait 24 hours before first wash
- Wash inside out (cold water)
- Avoid harsh chemicals
- Air dry where possible
- No direct ironing on design
💡 Smart Upgrade
Add a QR code linking to:
- Your Instagram
- Your WhatsApp
👉 One sale becomes:
- Repeat orders
- Reviews
- Referrals
🔁 Business Insight: Design = Sales
A good design doesn’t just look nice.
It:
- Weeds easily
- Presses cleanly
- Lasts through washes
- Looks premium in photos
🎯 Your action task
Before moving to Lesson 6:
- Choose your 5–8 go-to fonts — one or two scripts, the rest clean and bold enough to survive washing. Save or bookmark them.
- Set up your SVG folder system — Baby Grows, Bridal, Teacher Gifts, Holidays. Start as you mean to go on.
- Create a mockup in Canva for one design on your target product. This is your first product image — and your first sales tool.
- Print or save the placement cheat sheet from this lesson and keep it at your pressing station.
- Design your care card in Canva — even a simple text design works. Print a test version and put it with a sample product.
A good design weeds easily, presses cleanly, lasts through washes, and looks premium in photos. Simple, clean, and intentional will always outsell complicated.